Illustrators often will draw out perspective lines when beginning a complex illustration to help them keep everything looking just right.
The old way involves defining the vanishing point and then drawing a series of lines all intersecting and passing through that vanishing point. While effective this could be somewhat of a time consuming process.
Then while working with one of my students I recently discovered this great little trick for using Photoshop’s Vanishing Point filter to render perspective lines. Now whenever I need them Perspective Lines are just a few clicks away.
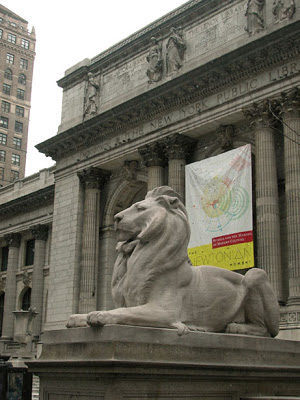
To show you how easy it is take a look at this image of New York’s Public Library:
 The perspective on this shot is pretty exaggerated, but that just helps illustrate my point. If I wanted to add something to the front of the library, or maybe add another building next to it it would be a big help to have some guides that showed me how the vanishing point lines lay in proper perspective.
Now I know one of the common uses for the Vanishing Point filter is to be able to clone and paste things in while keeping the proper perspective. But using the Vanishing Point filter only works well if the object I’m pasting in is “straight” to begin with.
Suppose the new building I want to add already has some perspective happening in the shot? This is where some guides showing me the correct perspective could be really helpful. And luckily that’s something the Vanishing Point filter can easily do.
By just following a few easy steps we can have those guides on a separate filter ready to help us keep everything looking right.
Step 1) Make a new layer so you have a place for the Perspective Grid to go. (Hint: give this layer a name that makes it easy to remember what it is.)
Step 2) Make this new layer the active layer by clicking on it in the Layers palette. Then go to Filter>Vanishing Point to bring up the Vanishing Point window.
Step 3) Using the Create Plane tool define a plane that follows the plane you want the perspective lines to follow. (I used the corners of the banner as an easy way to define the plane for the front of the library.)
Step 4) Once your plane has been defined expand it out to fill the necessary area by clicking on the handles in the middle of each side of your plane and dragging them out until they cover the area you need.
Step 5) Now here is the magic part: Looking at the menu bar in the Vanishing Point filter you’ll notice a small icon that looks like 3 short horizontal lines with a tine triangle just to the left of those lines. Clicking on this brings up a submenu like this:
Here is a close-up of that submenu:
See where I’ve highlighted the “Render Grids to Photoshop” option? If you choose this and then apply the filter by clicking on “OK” in the upper right corner of the filter window Photoshop will now render out those grids to that new layer you made just before bringing up the filter. You should get something looking like this:

And now all you need to do when adding that new building is to make sure the lines of the new building follow the lines in the grid and you’ll have everything following the same perspective.
Cool, eh?


