Black and White imagery has had a long tradition in the world of photography. And in this digital age Photoshop goes a long way to honor that tradition giving us many different ways to convert our Color images to Black and White with more control and finesse than ever before.
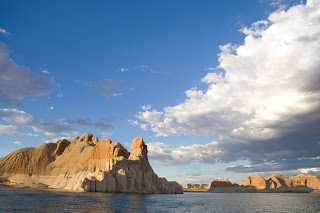
What I’d like to talk about here is how to make use of some of that control to easily get results that couldn’t be achieved before without a lot of effort. Suppose you have an image like this one I took at Lake Powell a couple of years ago.
Having grown up loving the dramatic skies in Ansel Adams’ images. When I looked at this image and thought of doing a B&W version I wanted to get close to that kind of drama in the skies. But as I worked on it with Photoshop CS3’s B&W adjustment layer I realized that I wanted to also bring out the detail and contrast in the cliffs. The adjustments that gave me a cool looking sky just didn’t seem to do what I wanted in the cliffs.
Here is a screen shot showing the image adjusted for the sky along with the settings I used to get that.
And when I worked to get the detail and tonality in the cliffs the sky just seemed to miss out on the drama. Here is a screen shot showing the image adjusted for the cliffs, again with the settings.
Luckily Photoshop gives us an easy way to have the best of both adjustments. The secret is to use both adjustment layers combined with layer masks that makes sure they’re only affecting the areas we want affected. To do this all I did was start out with one adjustment, in this case the one for the cliffs, and then by painting black in the layer mask I kept this adjustment from affecting the sky.
Here is a screen shot with the layer mask shown as a Red overlay:
Then all I had to do was copy the mask from the Cliffs adjustment layer to my Sky adjustment layer and invert the values so I had the opposite part of the image covered. That looked like this:
Finally all I had to do was give a quick look over the image to make sure none of the original color was showing up in between the two adjustments and voila I had this as the finished image:


