Of all the skills needed in doing High End Retouching, (or “Finishing” as they call it in the movie poster biz), masking is among the most basic and essential. When combining several images together a mask is used to determine what parts of the image are kept and which are not seen so the quality of your mask will have a big effect on the final image.
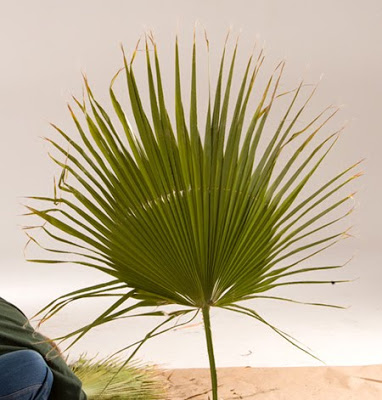
Think of it this way if you were going to add this palm frond to an image you’d want to make sure only the frond itself showed so you wouldn’t have any of the background or the guy messing up the image.

One quick way to make a mask for something like this is to copy one of the channels from the image and manipulate the contrast in the copied channel to make sure the background is separated from the frond.
A quick look at the Red, Green and Blue channels told me the Blue channel would make an easy starting point and so after copying that channel and Curves, (my favorite tool for this), I pushed the Black and White points over to get this:
 Pretty easy, eh?
Before moving ahead, in order to work correctly there are a couple of things we need the mask to do properly:
1) The edges have to have the right amount of contrast to them to make it look right. If the edges are too hard it’ll look cutout, and if they are too soft the image will look mushy and out of place.
2) The parts of the mask that are supposesd to be White need to be completely White and not have any ‘dirty’ specks. And the Black areas need to be completely Black and not have any ‘holes’.
If the mask has parts that are not clean you’ll see holes in the palm that don’t belong there, or you’ll see flecks of the background showing up in unexpected places. Hunting these mistakes down can be a time consuming hassle.
So here’s the long promised Tip: Use the Curves tool to double check the White and Black parts of the mask. Basically the idea is to make the mask as you think it needs to be, with the edges adjusted to the right hardness, then once again open up the Curves tool and push the White and Black points way over like these examples below:


And in the lower example I moved the White point way over to the right to check for any ‘holes’ in the black areas. Once again there was some in the middle part of the frond.
Note: An important thing to remember is that you’re only using this method to check your masks, be careful NOT TO APPLY these extreme Curves to your mask. You’re only looking for any problems that will need to be fixed.
Now that I knew where the problem areas were I could solve them using any of several ways, usually some combination of pushing the White and Black points over just enough along with some painting using the Brush tool to finish up the job.
The key is by temporarily exaggerating the Whites and Blacks of the mask you can see where the problems are and solve them before they become something more bothersome like unexplained specks on your beautiful composited images.
Until my next post Happy Masking!
Excellent explanation…one of the clearest I've ever read. Well done!