
One of the more frequent questions I get asked is about masking. Almost every Photoshop user has used masks at one time or another to control how one image blends with another to limit some effect to certain areas of the image. Safe to say they’re used a lot. But the question that comes up is “What makes a Good Mask?”
Of course the quick answer is “It all depends on what you’re trying to do.” What that really means is different tasks require different qualities of masks. For instance if you just want to ‘nudge’ the color of one area a little bit you may get away with a softer mask that’s not too exact. But if you’re going to strip in a new background behind a shot of a model you’re probably going to have to be a good deal more careful with your mask.
In this case the answer to our question “What makes a Good Mask?” is primarily about ‘Edge Quality’. With a mask the hardness or softness of the edge is what makes for a seamless, natural looking blend or something that looks like you used a pair of scissors on. This is what we mean when we talk about ‘Edge Quality’.
To get a bit deeper with this idea take a close look at the image of your model paying careful attention to the edges that naturally occur inside the image. The edge of your mask should look pretty close to how these natural edges look. Any harder than that and the image will look ‘Cut Out’. Any softer and it may look ‘Mushy’. (Great technical terms, eh?)
When I’m working on a mask I usually like to use a brush to paint around the edges of the part I’m masking. And while painting this edge I look to use a brush with the right size/hardness combination that looks as hard or as soft as the edge of whatever it is I’m masking. Sometimes this means I need to change the brush as I go along because maybe the depth of field means one part looks sharper than another. After I’ve painted this ‘border’ I’ll then use the lasso tool and
make a series of selections based on tracing more or less along the center of the border that are then filled to make the mask.
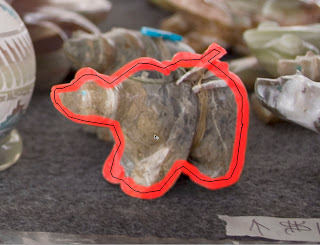
Here is an example.

With this image the red outline you see is the border I painted, and as usual the edge of this bear varies according to the depth of field so I had to change the brush along the way as I
painted.
Here is the image with a black line showing the selection I made with the Lasso Tool.
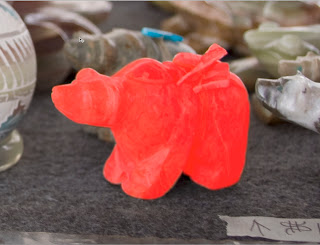
And here is the image with the mask filled using that selection.
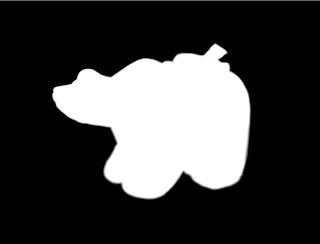
Now let’s check the mask to make sure it’s solid White and solid Black where it needs to be.
Finally here is the image with a new background.
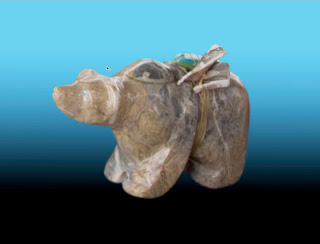
Of course since I used the mask as a “Layer Mask” all I’ve done is hide the original background so the new one can show through. This means I can easily fine tune this mask to make sure everything looks just right.